Scene Settings: Visuals
Visuals provide a way to interact with a scene — clearly a critical part of any app. Upon launching the Visuals editor, additional help is available by clicking icons next to each field. Here's a summary of the Visuals editor:
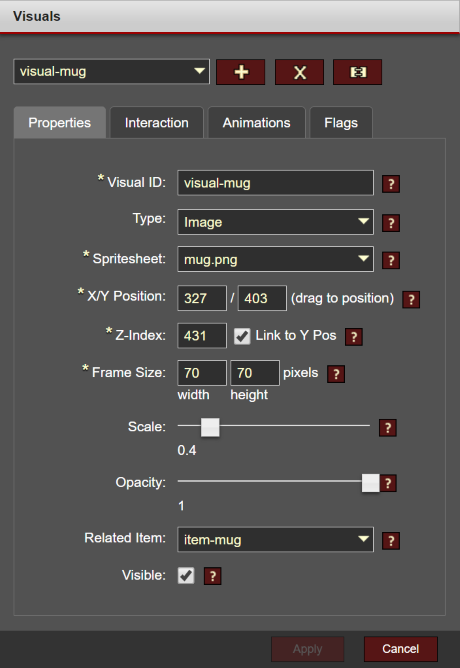
Properties
This tab sets the visual's type, appearance, frame size (for animations), and so on. There are multiple types of visuals: images, buttons, and labels. Depending on the type of visual you select, certain properties and options will be shown/hidden accordingly.
You'll notice that Image visuals have an optional Related Item dropdown. This is how you associate visuals with an inventory item. If such an association exists, visuals will be auto-hidden when that item is in a character's inventory. See also: The Differences Between Items and Visuals.
Interaction
This tab determines what happens when the visual is clicked. For most Image visuals you'll select the Set Target option, which means the visual will be set as the target of a scenario (e.g. the "sink" in Examine sink).
You can also execute scripts, save/load games, claim badges, and change scenes.
Animation
Image visuals have an associated image, which can serve as a "spritesheet" whenever animation is desired. You create animations and states for visuals with the same approach you'd use for characters. See Character Spritesheets and Animation for more details.
Flags
This tab determines which flags a visual has by default, as well as which flags are necessary for the visual to be visible. This reduces complexity in any scripts you may need, removing the need to manually show/hide visuals based on their flags. Your scripts and scenarios can simply toggle flags on visuals and rely on Tenterhook to take it from there.